Setting up Webpack in ASP.NET Web Forms

There are quite a bit of web applications built with and still running on ASP.NET Web Forms. Even though it may not be the new shinny toy to play with, there is no reason why Web Forms projects can't leverage some of the latest tools in the front-end development space.
In this post, you'll see how you can integrate webpack into an ASP.NET Web Forms project where we will set it up to transpile and bundle some TypeScript code.
At the time of writing, the current version of
webpackis at 3.2.0,TypeScriptis at version 2.4.1, and I'm usingNodeJS7.2.1.
I'll be using Visual Studio 2017 with the free Web Essentials 2017 extension installed. If you you're doing any web development in Visual Studio and you haven't checked out Web Essentials yet, go install it now. You'll thank me later. While you're at it, make sure you have a current version of NodeJS installed and available on your path. We're going to start off with a new Web Forms project created using the default template in Visual Studio.
Installing Webpack and TypeScript
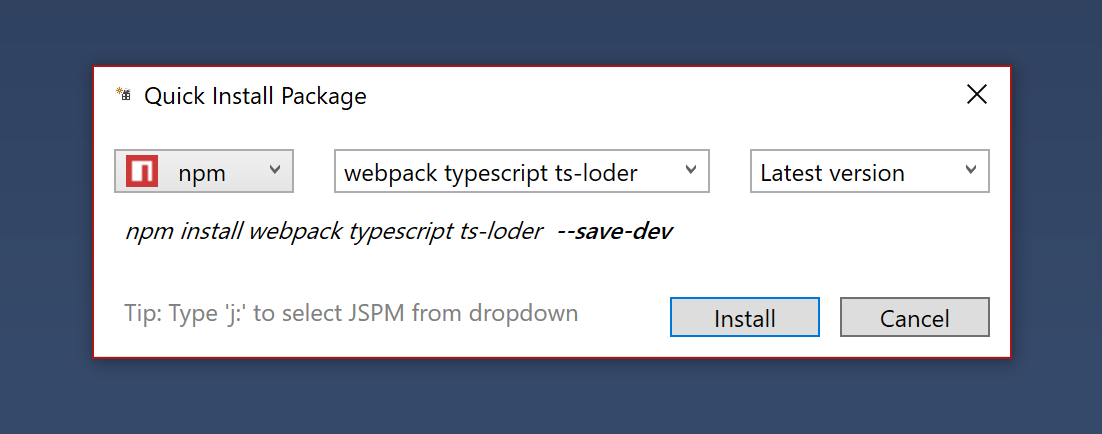
Webpack is a NodeJS package so we can install it using npm. If you don't feel like opening up the command line, Web Essentials adds a useful feature that makes installing packages fairly easy. If you use the shortcut SHIFT-ALT-0, it will open a package install dialog that can be used to work with front-end package managers. Just select npm from the drop down and enter the packages you want to install, i.e. webpack. While we're here, let's install the TypeScript package and the ts-loader package too.
Once that's completed, you should notice that a package.json file was added to your project. We'll come back to that later on.
Let's add some code
There's should be a Scripts folder that got created by default whenever you generated the Web Forms project. Inside that Scripts folder, add two sub folders named src and dist. The src is where the 'raw' TypeScript files are going to go and the transpiled JavaScript will go in dist. If you prefer to keep your TypeScript and JavaScript files together, that's totally fine. I prefer to separate them.
We'll add these two simple scripts below.
// greeter.ts
export class Greeter {
    to: string;
    constructor(to: string) {
        this.to = to;
    }
    greet():string {
        return `Hi ${this.to}!`;
    }
}
// main.ts
import { Greeter } from './greeter';

let greeter: Greeter = new Greeter('Cecil');
let greeting: string = greeter.greet();

console.log(greeting);
At the root of the project, we'll also add a TypeScript configuration file (tsconfig.json) that we'll use to tweak the compiler settings. You can use the Add New Item dialog in Visual Studio to create one for you. Here are the settings I'll be using.
{
  "compilerOptions": {
    "noImplicitAny": false,
    "noEmitOnError": true,
    "removeComments": false,
    "sourceMap": true,
    "target": "es5",
    "module": "commonjs",
    "moduleResolution": "node"
  },
  "exclude": [
    "node_modules"
  ]
}
Optional Visual Studio 2017 comes with some built in support for TypeScript. Since we're going to be using the version of webpack and TypeScript we installed via npm, you might want to turn the TypeScript build feature off. To do that, simply add a TypeScriptCompileBlocked element to a PropertyGroup in your .csproj file and give it a value of true.
<PropertyGroup>
   <TypeScriptCompileBlocked>true</TypeScriptCompileBlocked>
</PropertyGroup>
Adding Webpack configuration
By default, webpack will look for a webpack.config.js file in the current directory. Since there's no template for creating the configuration file, we can just add one manually.
// webpack.config.js
const path = require("path");

module.exports = {
    context: path.resolve(__dirname, "./Scripts/src"),
    resolve: {
        extensions: ['.ts']
    },
    entry: {
        main: './main'
    },
    output: {
        publicPath: '/Scripts/dist',
        path: path.resolve(__dirname, './Scripts/dist'),
        filename: '[name].build.js'
    },
    module: {
        rules: [
            {
                test: /\.ts$/,
                use: 'ts-loader',
                exclude: /node_modules/
            }
        ]
    }
};
Let's break down what's going on in this file.
- context - This sets the base directory where
webpackshould look for files. Here we're setting it to the "Script/src" folder we created earlier. - resolve.extensions - This lists the file extensions
webpackshould use to resolve modules. In our example, we're only looking for.tsfiles. - entry - This specifies the root modules for the application. In our case,
main.tsis the root. Since it importsgreeter.tsas a dependency,webpackwill include both files when generating the bundle. - output - Here is where we tell
webpackto send the final bundles. If you look at the config above, the bundles will be sent to theScripts/distfolder. The[name]token in thefilenamesetting will be replaced with the name of our entry point, so we should expect a bundle with a name ofmain.build.js. - module - Out of the box,
webpackonly knows how to work withJavaScriptfiles. To add support for bundlingTypeScriptfiles, we'll need to add a loader. Earlier on we install thets-loadervianpm. Here we'll create a rule that states any.tsfiles should be loaded with thets-loader.
The last thing we're going to do to get webpack building the .ts files is to add a simple build script to the package.json file. This file should have been added to the project when we installed the npm packages earlier.
{
  "devDependencies": {
    "ts-loader": "^2.2.2",
    "typescript": "^2.4.1",
    "webpack": "^3.2.0"
  },
  "scripts": {
    "build": "webpack"
  }
}
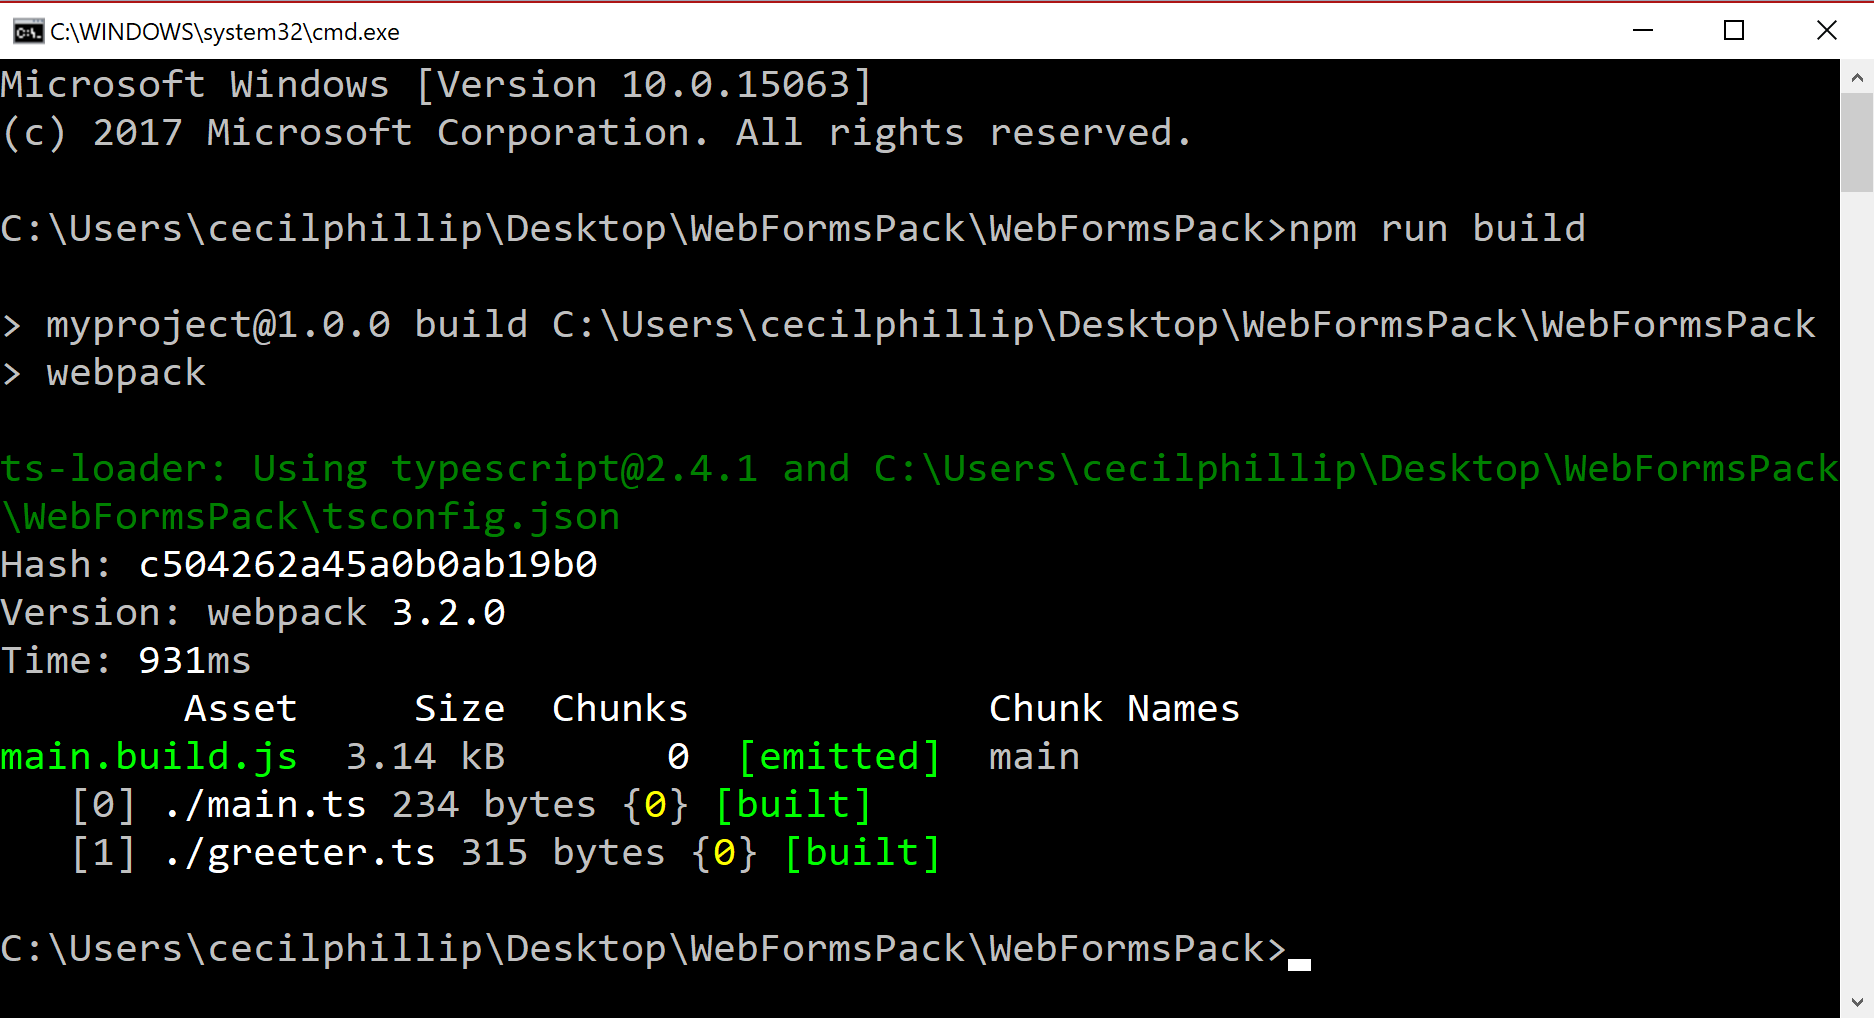
If we were to run npm run build on the command line we should see some output resembling the following screenshot.
With Web Essentials 2017 installed, you can use the ALT-SPACE shortcut to quickly bring up a command prompt in your project directory.
Take a look inside of the dist folder and you should see the bundled main.build.js file. You will have to manually include this file in your Visual Studio project. In the Solution Explorer, enable Show All Files then you can just right-click the file and select Include in Project.
Bundle on build
Having to open a command prompt and run npm run build gets annoying after a while. What we can do instead is add a MSBuild task to have Visual Studio run our webpack build whenever we hit F5.
  <Target Name="BeforeBuild">
    <Exec Command="npm run build" />
  </Target>
With this task added to our .csproj file, we'll have the TypeScript and Web Forms code building together.
Registering with the ScriptManager
The Web Forms project templates come with a BundleConfig.cs file that allows you to add mappings for your client side scripts. You can do things like specify the debug file, the production file, or even a CDN path if you have one.
We can add the webpack bundled file to the ScriptManager like this like this.
// RegisterBundles method in BundleConfig.cs
ScriptManager.ScriptResourceMapping.AddDefinition("myscripts", new ScriptResourceDefinition
{
    Path = "~/Scripts/dist/main.build.min.js",
    DebugPath = "~/Scripts/dist/main.build.js"
});
<!-- Site.Master -->
<asp:ScriptManager runat="server">
    <Scripts>
        .....
        <asp:ScriptReference Name="myscripts" />
        ......
    </Scripts>
</asp:ScriptManager runat="server">
Wait a minute! We never generated a minified version of our bundle. Let's do that now.
Minifying Webpack bundles
Webpack has built-in support for minification, so we just need to turn it on. The way we do this is by adding a plugin called UglifyJsPlugin to the configuration file. Also, let's set this up so that the plugin is only run during release builds.
Here's what the updated webpack.config.js looks like.
const path = require("path");
const webpack = require("webpack");

module.exports = function (env) {
    const isProduction = env === 'prod';

    return {
        context: path.join(__dirname, "./Scripts/src"),
        resolve: {
            extensions: ['.ts']
        },
        entry: {
            main: './main'
        },
        plugins: isProduction ? [new webpack.optimize.UglifyJsPlugin()]
                               : [],
        output: {
            publicPath: '/Scripts/dist',
            path: path.join(__dirname, './Scripts/dist'),
            filename: isProduction ? '[name].build.min.js':'[name].build.js'
        },
        module: {
            rules: [
                {
                    test: /\.ts$/,
                    use: 'ts-loader',
                    exclude: /node_modules/
                }
            ]
        }
    }
};
The first thing we did was get a reference to the webpack npm package. Remember, webpack.config.js is just a JavaScript file.
We changed the module.exports assigment from a JavaScript object to a function that returns a JavaScript object. This allows us to accept command line parameters that we'll use to set the build environment.
We added a plugins section to our configuration. Here we're toggling the UglifyJsPlugin on or off based on if we're in production mode or not. We're also doing something similar with the filename setting in the output section.
Next we'll update the package.json file to pass the environment settings to webpack.
{
  "devDependencies": {
    "ts-loader": "^2.2.2",
    "typescript": "^2.4.1",
    "webpack": "^3.2.0"
  },
  "scripts": {
    "build-dev": "webpack",
    "build-prod": "webpack --env=prod"
  }
}
We now have two npm build scripts for generating bundles, so we'll have to update the .csproj file too if you want to maintain that F5 experience.
 <Target Name="BeforeBuild">
   <Exec Command="npm run build-prod"  />

   <Exec Command="npm run build-dev"
         Condition="'$(Configuration)' == 'Debug'"/>
 </Target>
Now you can toggle between Debug and Release mode in Visual Studio, and MSBuild will kick off webpack to create your bundles.
One thing you might notice, is that the MSBuild tasks doesn't run if there haven't been any changes in your .NET code since the last successful build. You can get around this buy just running the npm scripts directly by firing up the command line or you can install the handy NPM Task Runner extension from Mads Kristensen.
Conclusion
ASP.NET Web Forms is still a viable option for creating web applications. In this post you saw how to integrate webpack into your projects. Hopefully you'll take that further and figure out how to incorporate other technologies like VueJS, Aurelia or React.