Adding Webpack to your Gulp Tasks

Gulp has been a popular task automation toolkit in the frontend web development space for some time now. It has an solid community that's continuing to add new features and plugins to make setting up your build pipeline easier. Depending on the tool you use to scaffold your web project, you may already have support for Gulp ready to go.
If you're like me, you may already have made an investment in adding Gulp to many of your new and existing projects. Actually, I have gulp tasks in a file that I tend to just copy what I need from it into new projects and tweak accordingly. In this post, we'll see how to have Gulp use Webpack for bundling.
Adding Gulp to your project
Now if you have Gulp already setup then you can skip this section. I'm going to build off the TypeScript project that was created in a previous post. As a quick catch up, here's what the webpack.config.js and *.ts files look like.
//webpack.config.js
var path = require('path');
var webpack = require('webpack');
module.exports = {
    entry: {
        main: './Scripts/main',
        other: './Scripts/other',
    },
    resolve: {
        extensions: ["", ".webpack.js", ".web.js", ".ts", ".js"]
    },
    output: {
        publicPath: "/js/",
        path: path.join(__dirname, '/wwwroot/js/'),
        filename: '[name].build.js'
    },
    module: {
        preLoaders: [
           { test: /\.ts$/, loader: 'tslint' }
        ],
        loaders: [
            { test: /\.ts$/, loader: 'ts-loader' }
        ]
    }
    tslint: {
        failOnHint: true,
        configuration: require('./tslint.json')
    }
};
// greeter.ts
export class Greeter {
    to: string;
    constructor(to: string) {
        this.to = to;
    }
    greet():string {
        return `Hi {this.to}!`;
    }
}

// other.ts
console.log("Nothing special happening here.");

// main.ts
import {Greeter} from './greeter';

let greeter : Greeter = new Greeter('Cecil');
let greeting: string  = greeter.getGreeting();

console.log(greeting);
Based on the Gulp documentation, its recommended to install the gulp-cli globally in addition to installing a local version of Gulp as a devDependency in your package.json file. Running the following commands will take care of that for you. Make sure your command terminal is located at your project root.
npm install gulp-cli -g
npm install gulp --save-dev
Adding a Webpack Task to Gulp
To plug Webpack into a Gulp task we're going to use the webpack-stream package. This package will allow Webpack to be run in a stream which is what we need. Go ahead and grab it from NPM along with a few other packages that we'll make use of.
npm install webpack-stream gulp-print gulp-util del vinyl-paths --save-dev
Next, let's add the Gulp task to the gulpfile.js file in your project. If you don't have one already just create an empty file in your project root.
const gulp = require('gulp');
const gprint = require('gulp-print');
const gutil = require("gulp-util");
const del = require('del');
const vinylPaths = require('vinyl-paths');
const webpack_stream = require('webpack-stream')
const webpack_config = require('./webpack.config.js');

const paths = {
    src: './Scripts/',
    build: './wwwroot/js/'
};

gulp.task('clean', () => {
    return gulp.src(`${paths.build}*`)
        .pipe(gprint())
        .pipe(vinylPaths(del));
});

gulp.task('webpack', ['clean'] ,() => {
    return webpack_stream(webpack_config)
        .pipe(gulp.dest(`${paths.build}`));
});

gulp.task('default', ['webpack']);
I'm keeping this gulpfile.js file fairly minimal for the sake of the post. There are only 2 gulp tasks defined; clean and webpack. In the clean task, we're taking a stream of all the files from the /wwwroot/js folder and piping them into del to be deleted. This makes sure the output folder our the build is nice and clean. del isn't stream based, so the vinyl-paths package is used to get the file paths out of the stream and pass them into del. The gulp-print package is optional, but I find it useful to print out what files are getting piped around. It comes in handy when diagnosing build issues.
In the webpack task we're simply passing the exported config from webpack.config.js and handing it over to webpack-stream. Also notice that the webpack task relies on the clean task to be run first. This makes sure that the destination folder is empty before running your build. On the rare occasion that you rename or remove bundles, it's good to have a clean space for your final output. You may continue to add other build steps to compose your pipeline the way you want it. For instance, you may want to invoke Typings as a pre-step to restore your *.d.ts definition files.
If you're following along from the previous post and have your
precompilescript set to call webpack, you can now change that to["gulp webpack"]or just["gulp"]since that's the default task.
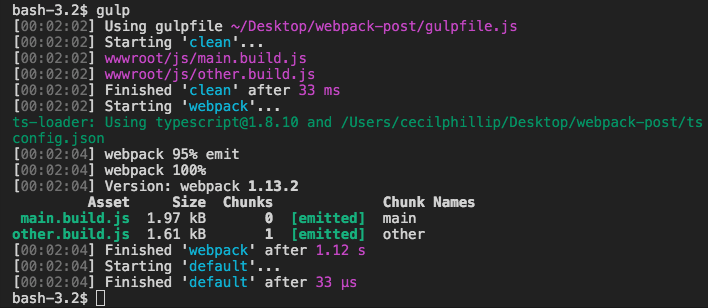
Now we should be able to kick off a build by just running gulp on in the terminal.
One interesting feature of the webpack-stream plugin is that if you wanted to use a different version of Webpack than what the package depends on, you can require and pass that version along in an optional 2nd parameter.
const gulp = require('gulp');
const gprint = require('gulp-print');
const gutil = require("gulp-util");
const del = require('del');
const vinylPaths = require('vinyl-paths');
const webpack_stream = require('webpack-stream')
const webpack = require('webpack');
const webpack_config = require('./webpack.config.js');

.....

gulp.task('webpack', ['clean'] ,() => {
    return webpack_stream(webpack_config, webpack)
        .pipe(gulp.dest(`${paths.build}`));
});
What's changed here is that now the webpack module is being required in the gulpfile.js, and the webpack task had been updated to use that included package.
There's also the option of skipping webpack-stream completely if that's your preference. Here's what the updated Gulp task would look like.
gulp.task('webpack', ['clean'] ,(done) => {
   webpack(webpack_config, function(err, stats) {
        if(err) {
            throw new gutil.PluginError("webpack", err);
        }
        else {
            gutil.log("[webpack]", stats.toString());
        }
        done();
    });
});
Instead of plugging into the streaming infrastructure of Gulp, we're using the locally installed version of Webpack. The task is provided with a callback, done, that is used to signal when the work is complete.
Just FYI
The package versions used at the time of writing are as follows:
- Webpack 1.13.2
- Gulp 3.9.1
- webpack-stream 3.2.0
Conclusion
In this post, we saw how easy it was to integrate Webpack into a Gulp pipeline. If you have existing investments in Gulp tasks, Webpack bundling can be added as a task without disrupting your workflow. As you can image, the combinations can get much more complex as the application grows. You now have the ability to mix Gulp plugins with Webpack plugins and loaders to create a build pipeline that works for you.