Bundling TypeScript with Webpack

The previous post in this Webpack series got you setup in ASP.NET Core, and added features like minifying and hashing to your Webpack bundles. In this post we'll have a look at loaders and how we can use them to add TypeScript support to Webpack.
Webpack Loaders
Out of the box, Webpack knows how to bundle your JavaScript files. But what if you wanted to work with other types of files? What if you wanted to add CSS or images to your bundles? Maybe your team just adopted ES2015 or TypeScript and you need your code compiled down to ES5 to support a wider range of browsers. Well, this is where Webpack loaders can help.
Loaders provide another way for you to extend your Webpack builds. They allow you to apply custom processing against a given set of files in your project. This opens up the possibility of teaching Webpack to work with new file formats or even apply additional transformations to your bundles. Let's see how we can wire up Webpack to support TypeScript.
Adding Some TypeScript
TypeScript aims to be a superset of JavaScript. It has some useful features like type checking along with ES2015 features like classes and modules. If you're unfamiliar with TypeScript definitely check out their documentation.
In your project, go ahead and add a greeter.ts file to the Scripts. If you are following along from the previous posts, this folder should be at the root of your project's directory.
// greeter.ts
export class Greeter {
    to: string;
    constructor(to: string) {
        this.to = to;
    }
    greet():string {
        return `Hi {this.to}!`;
    }
}
The code above was adapted from the TypeScript Playground. As you can see, TypeScript supports ES2015 class declarations. What's even better is the type annotations support which comes in handy when preventing and tracking down bugs. When TypeScript gets compiled, the annotations get removed and what you end up with is pure JavaScript.
In the Scripts folder, rename main.js to main.ts. Now update main.ts to use the Greeter class that was created above.
// main.ts
import {Greeter} from './greeter';

let greeter  :any = new Greeter('Cecil')
let greeting :any = greeter.getGreeting()

console.log(greeting);
What you'll notice is that we're using the ES2015 module syntax to export Greeter from greeter.ts and import it into main.ts. Most browsers don't support ES2015 modules at this time so the TypeScript compiler will need to be configured to convert your code into another module format. To configure compiler options for your TypeScript project we'll add another file to the root of the project; tsconfig.json.
{
    "compilerOptions": {
        "target": "es5",
        "module": "commonjs"
    },
    "exclude": [
        "node_modules",
        "wwwroot"
    ]
}
By adding a tsconfig.json file to the project, we're able to specify compiler options such as what files to include/exclude. The presence of the tsconfig.json file marks that directory as the root of your TypeScript project. Thus, the compiler will research recursively downwards in the file system to find *.ts files.
The example above tells the TypeScript compiler to create ES5 compatible JavaScript and use the CommonJS module format. It's also telling the compiler not to search the wwwroot or node_modules folders for TypeScript files. For more information on what options are available for the tsconfig.json file, have a look at the official documentation.
Compiling TypeScript in Webpack
To enable Webpack to handle compiling TypeScript code, we'll need to configure a loader in the webpack.config.js file. There are a few community supported TypeScript loaders to choose from. We'll be using the TypeScript loader for webpack. The first step is to add ts-loader package to the package.json as a dev dependency with the command:
npm install ts-loader --save-dev
Now let's add the newly installed loader to webpack.config.js file.
var path = require('path');
var webpack = require('webpack');

module.exports = {
    entry: {
        main: './Scripts/main',
    },
    resolve: {
        extensions: ["", ".webpack.js", ".web.js", ".js", ".ts"]
    },
    output: {
        publicPath: "/js/",
        path: path.join(__dirname, '/wwwroot/js/'),
        filename: '[name].build.js'
    },
    module: {
        loaders: [
            {
                test: /\.ts$/,
                loader: 'ts-loader'
            }
        ]
    }
};
Ok, that's it. The configuration is setup to start bundling TypeScript files.
You'll notice that we've added two new sections to the configuration; resolve and module. The resolve section defines rules for how Webpack will handle resolving modules. In the example, we're using the extensions property to list the file extensions Webpack will use when it is discovering modules. The default for this setting is actually ["", ".webpack.js", ".web.js", ".js"]. We've added the .ts extension to make tell Webpack to resolve TypeScript files too.
The loaders section under module lists all the loaders we want to configure with Webpack. In this case, we're only setting up the TypeScript loader. We pass in a JavaScript object with the name of the loader and a regular expression to match the files the loader should be applied to. This is generally how most Webpack loaders will get setup.
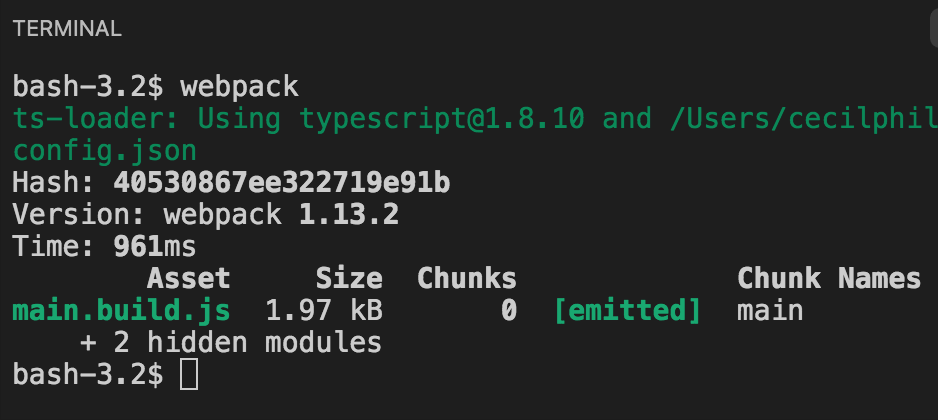
Kicking off a Webpack build with the loader wired up as shown you'll see the TypeScript files get compiled and bundled into the main.build.js file.
Preloading TSLint
One thing that's common in frontend web development is having linter run against your code prior to building. This will alert you of any potential problems, common mistakes, or style violations you might have made. Its helpful to run a linter against the TypeScript code before Webpack goes ahead to bundle it.
Now, one thing I didn't mention before was that Webpack loaders can be set to execute in certain stages via hooks in the configuration. Specifically, in the webpack.config.js you can define preLoaders, loaders, and then postLoaders to run exactly in that order. Note that the loaders themselves don't behave any differently, but we do have some control over when they run. Let's see how we can enable TypeScript linting in the preLoader step.
Run the following command to add a TSLint loader to the project.
npm install tslint-loader tslint typescript --save-dev
As you can see, tslint-loader requires you have tslint and typescript installed as dependencies in the package.json file. Now we'll update the webpack.config.js file to use the tslint-loader in the preloader step.
var path = require('path');
var webpack = require('webpack');

module.exports = {
    entry: {
        main: './Scripts/main',
    },
    resolve: {
        extensions: ["", ".webpack.js", ".web.js", ".ts", ".js"]
    },
    output: {
        publicPath: "/js/",
        path: path.join(__dirname, '/wwwroot/js/'),
        filename: '[name].build.js'
    },
    module: {
        preLoaders: [
           { test: /\.ts$/, loader: 'tslint' }
        ],
        loaders: [
            { test: /\.ts$/, loader: 'ts-loader' }
        ]
    }
    tslint: {
        failOnHint: true,
        configuration: require('./tslint.json')
    }
};
What's new here is the addition of the preLoaders and tslint configuration sections. In the preLoaders section, the tslint-loader has been setup to run against the matched .ts files in the project. Notice its setup looks almost identical to ts-loader configuration.
The tslint section near the bottom is where you can configure the linting settings. Here we're pointing it to an external tslint.json. You have the option of adding the linting settings directly in the webpack.config.json file but my preference is to keep them separate. It makes the linting settings more portable. Here's an example of what the tslint.json file might look like
{
    "rules": {
        "class-name": true,
        "no-duplicate-variable": true,
        "no-any": true,
        "semicolon": [
            true,
            "always"
        ]
    }
}
There are quite a few linting options for you to choose from that are all well documented on the tslint site. The sample above enforces PascalCased names for classes, disallows usages of any as a type declaration, and enforces consistent semicolon usage.
Kick off a build now and you'll see Webpack lint, compile and bundle your TypeScript code. Update the main.ts file to resemble the sample below and try running a build again.
import Greeter from './greeter';

let greeter  :any = new Greeter('Cecil')
let greeting :any = greeter.getGreeting()

console.log(greeting);
You should see warnings similar to the following displayed in your terminal.
WARNING in ./Scripts/main.ts
[3, 13]: Type declaration of 'any' is forbidden
[5, 15]: Type declaration of 'any' is forbidden
[3, 40]: Missing semicolon
[5, 42]: Missing semicolon
Since there are warnings from the linter in the preloader step the rest the have prevented the rest of the bundling from moving forward.
Conclusion
Webpack loaders offer power extensibility options to your frontend build process. We saw how to take TypeScript code, lint it, compile it, and bundle it. Similar loaders are available for Less, Sass, CoffeScript and others. I'd encourage you to take a look at some of the other loaders or even try making one of your own.